In an earlier blog post we talk through how we installed a MaxxFan in the roof of the van. We had initially intended that this would be the only roof light, but after looking around other vans at Camp Quirky we realised that we should add a second rooflight over the bed, to let more light in and increase the feeling of space. We chose to get a Dometic Heki Midi rooflight, as it has a 700 x 500 cut out which we felt fitted best in the space we had available.
It isn’t as easy to fit a rooflight in the rear section of the roof as the front; there is a supporting strut for the roof panel and the roof has a trapezoid shape and doesn’t have a flat area designed to install rooflights / fans, in fact there are nine ridges to deal with if you are looking to install on the back section! This made the installation process quite a bit more complicated as we had to build up the roof to give a flat surface on top and make up a bespoke frame to give a flat surface inside. In all it took us around 6 hours to fit the rooflight, compared to 2 to 3 hours to install the windows.
We started off using an angle grinder to cut through the supporting strut inside the van before pulling it off, being really careful not to cut through the roof -eek! (we did put a little scuff in to it, but thankfully it was very shallow and can just be hammerited).
Then we were up on the roof to mark out and cut the 700 x 500mm hole for the rooflight. We spread dust sheets across the roof and used wooden boards to make sure we didn’t dent the roof walking / kneeling on it.
As with the windows, it is important that the rooflight is centred in the panel and we put our masking tape down and carefully marked out where we wanted it to go. When the rectangle was marked, we measured the diagonals to make sure that we had in fact drawn a rectangle (they should be the same). We then marked 12.5mm in from each corner as we only have a 25mm hole cutting bit, rather than the 24 recommended by Dometic’s instructions.

The cut out began by using a centre punch and then drilling a pilot hole through the marks, it was then on to the hole saw in each corner.
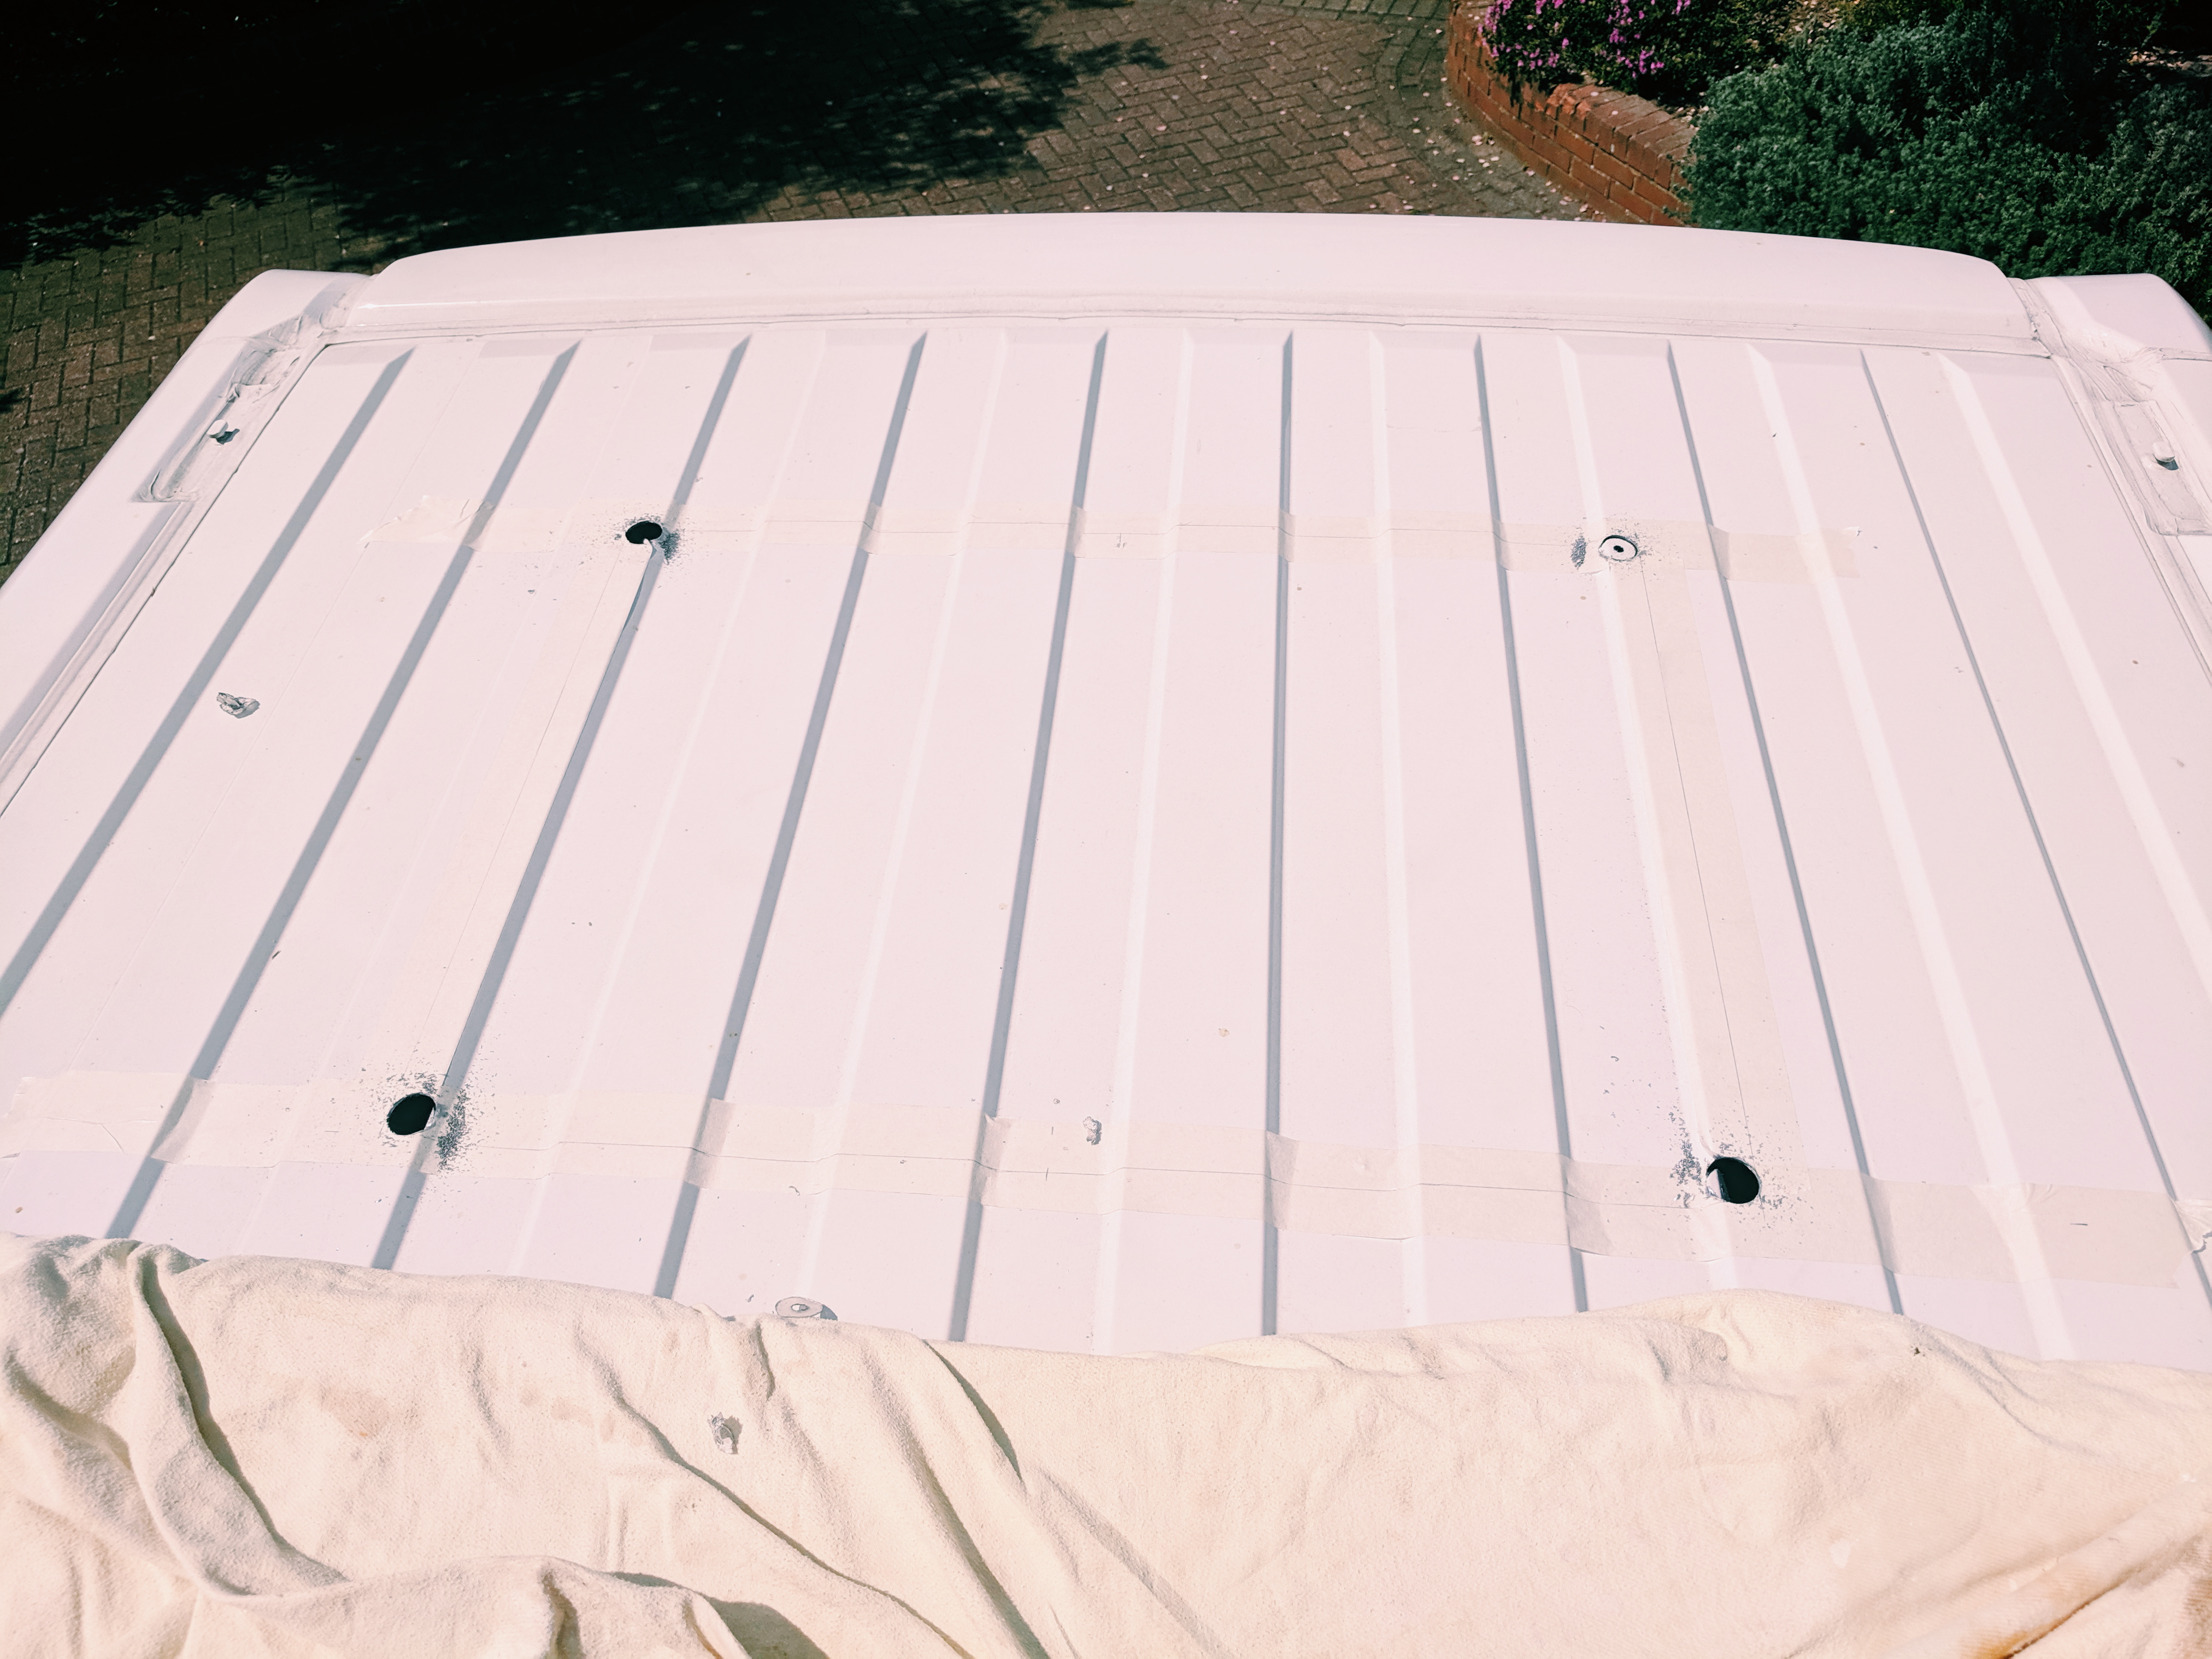
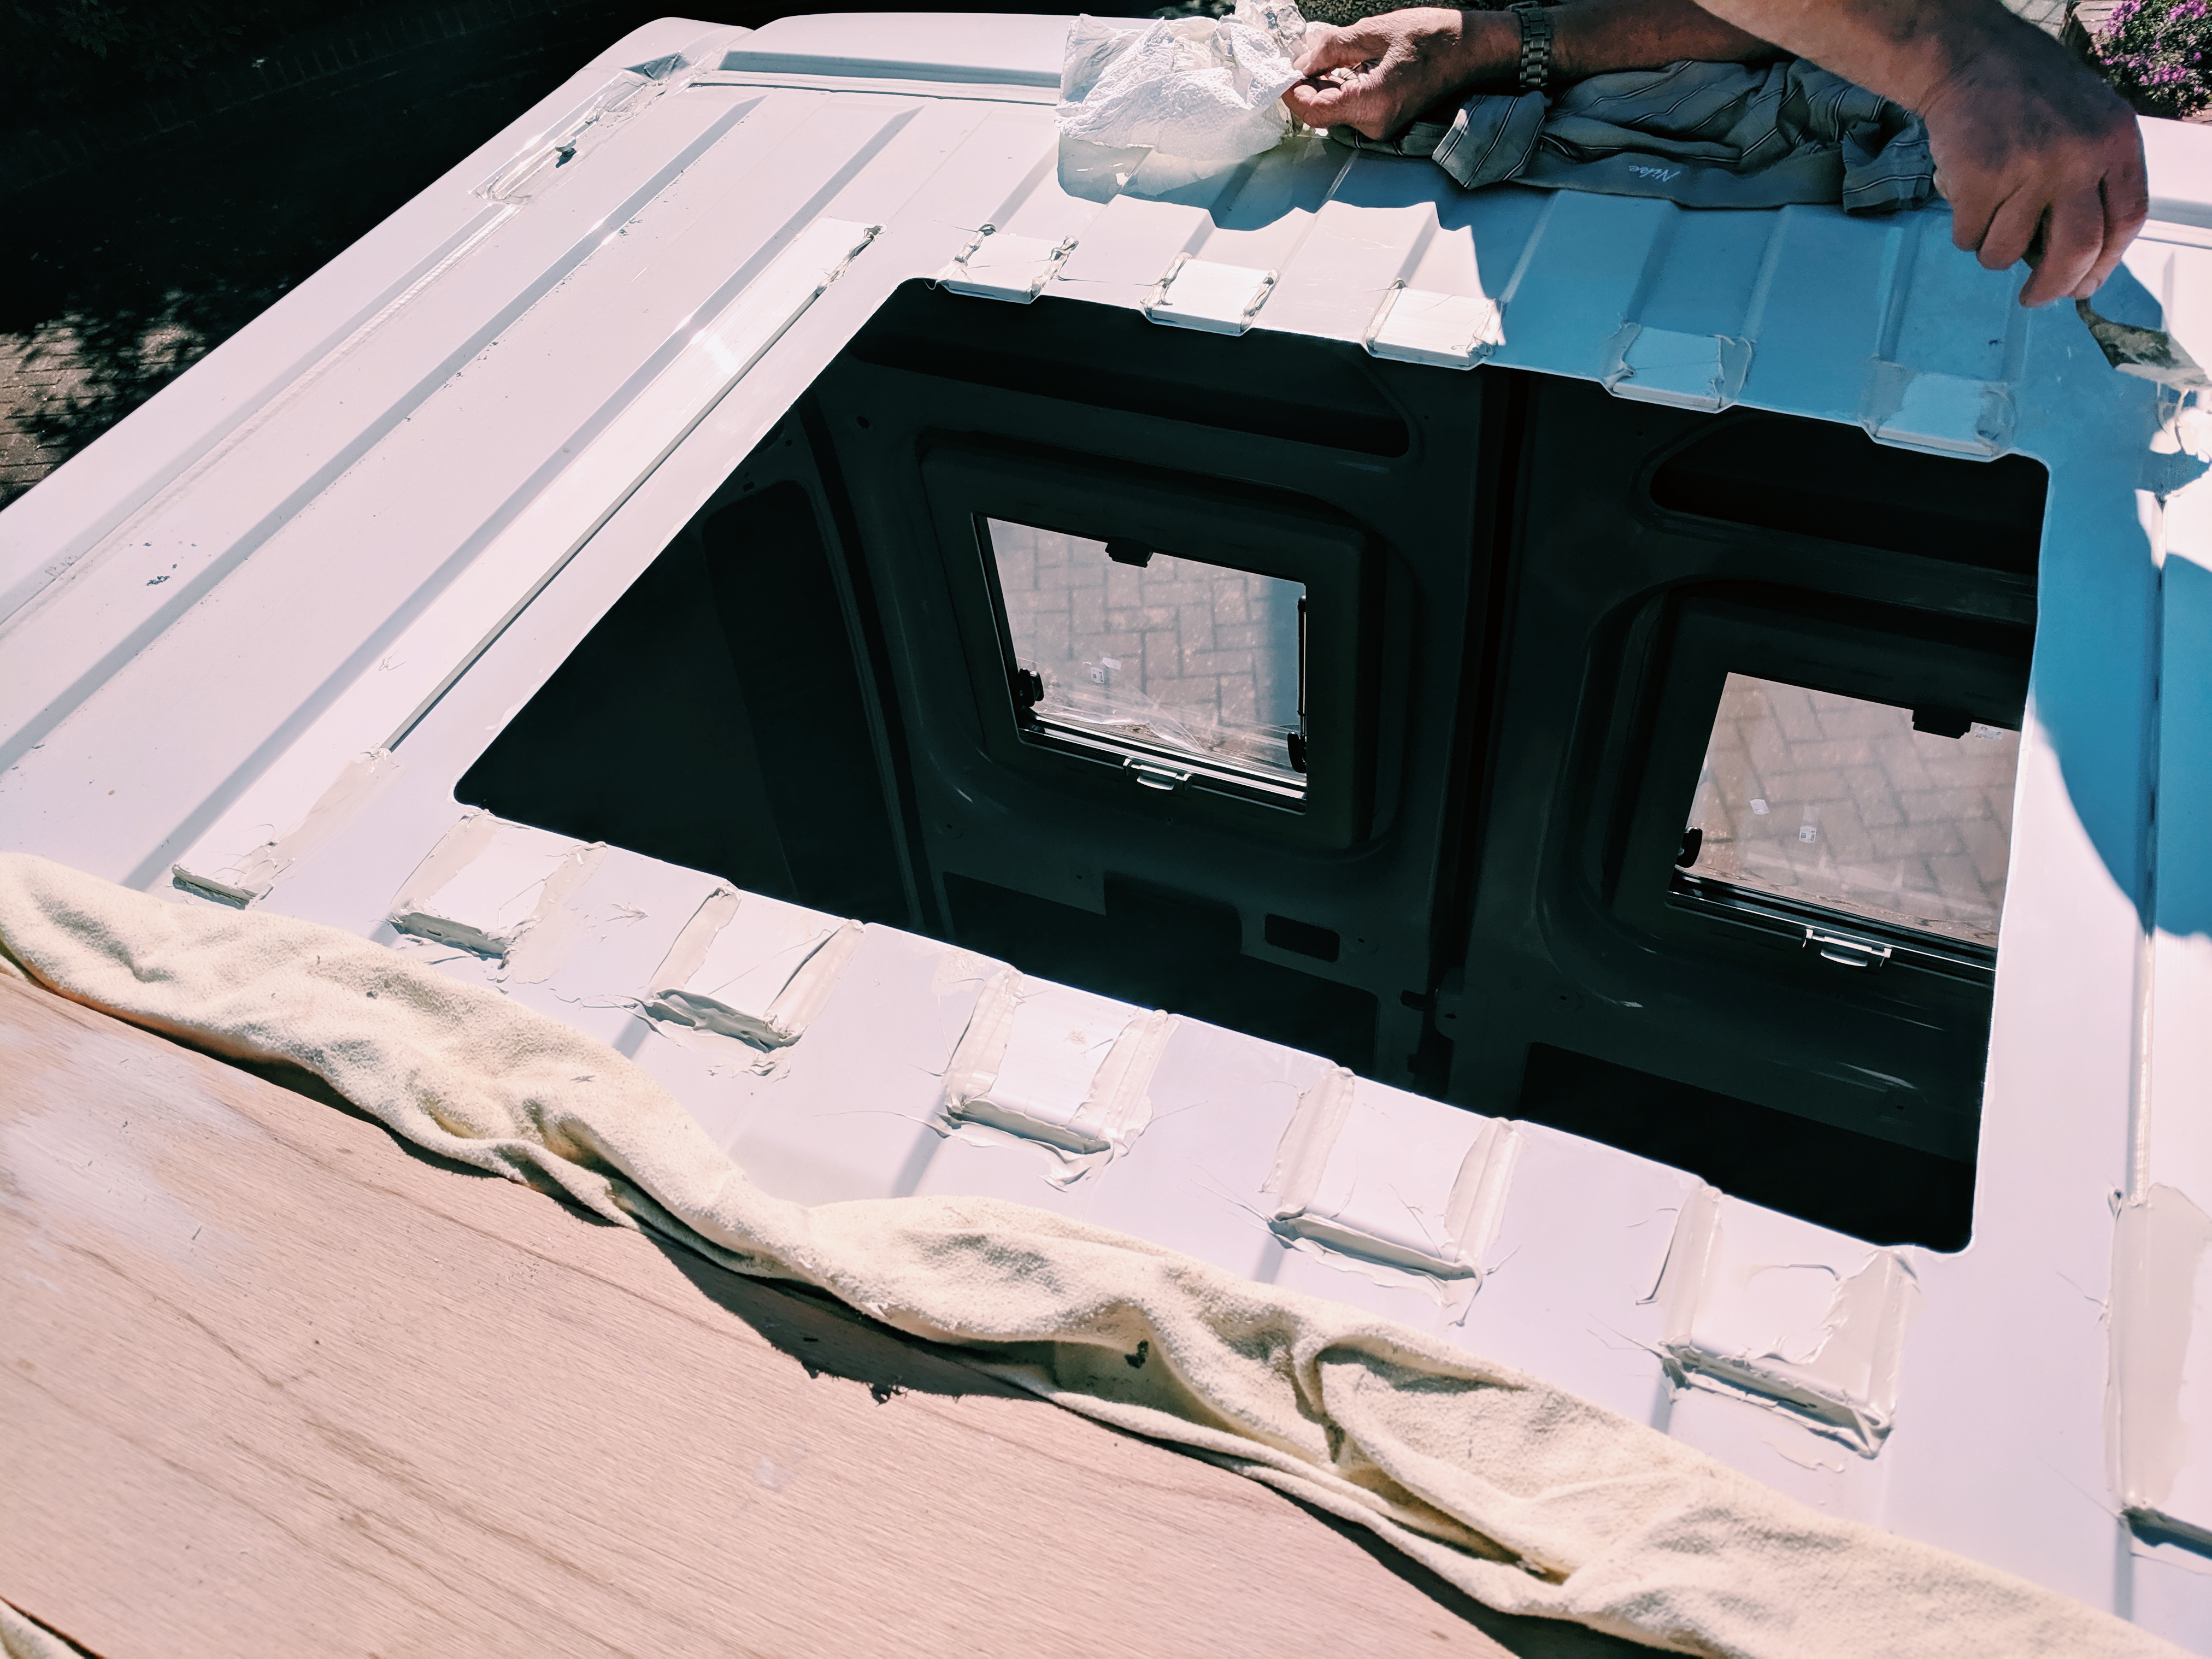
Next we used the jigsaw to join up the holes we had drilled and cut out the hole. The roof is really very thin, so we would recommend making the cut nearest the back of the van first and doing this off a ladder rather than from the roof. We then did the two side cuts before making the last cut, making sure that the board we were kneeling on was over an internal strut and not going to push the bit of roof we were cutting down. It is also important to support the piece that you are cutting out from the inside when making the last cut, as otherwise you could bend the metal.

We then had to build up the roof so that we had a flat surface around the hole for the rooflight to bed on to. Dometic do sell a custom plastic adapter which will do this, but the only place we could find with it was in Germany and with shipping it would have cost £90 and taken a week to arrive. You could just use sealant to build up the gap, but it would be very thick in places and you might distort the roof a bit when you clamped the rooflight down – see the diagram below for why – so we used pieces of 65mm upvc to fill in the gaps. We cut these to size and bonded them to the roof with Sikaflex 521, making sure that there were no gaps which water could get through. This gave us a mostly flat top surface which to install the rooflight on.
Why the roof might distort
As the roof on our Ducato is a trapezoid shape, the inside and outside sections of the rooflight will be clamping on different surfaces which will not be in contact. If you look at the diagram below, you will see that the force from the top panel and the bottom panel, represented by the arrows is being applied to alternate faces of the trapezoids. This means that they are each clamping against unsupported faces and you could deform the roof.

After building up the ridges with upvc and Sikaflex, we now had a flat external face for the rooflight, but the internal one was still not flat. If you had already insulated and boarded your roof you could just fix the inner frame to this boarding, as long as it was thick enough not to flex when you tighten the clamps on the rooflight. We are cutting all of the external holes first, as this prevents metal swarf being trapped within the vehicle and in any event our roof cladding will only be 6mm, so not strong enough to clamp against. Our solution was to make up an internal oak frame (we used oak as it might be visible depending on how we decide to clad), with dados cut in it to allow it to sit flush to the roof. We chose to make the frame 32mm thick, so that the cladding will screw against it and the inner frame will be partly recessed into the roof. This should hopefully give a nice professional finish!
So it was off to the workshop to plane and thickness the oak, before dadoing it and then jointing it with a Festool domino. We cut the long pieces to 671, rather than 700, which meant we had to cut wings into the sides. You would be best to cut the long pieces at 700 (or a fraction over) to save unnecessary work. When the glue had dried we then sanded the face you may see to 240 grit.

It was now time to put everything together and install the rooflight. Following the instructions we got our friend Sikaflex out again and ran a really thick bead of sealant in the groove on the rooflight (we used nearly 1 tube installing the rooflight, so have a second just in case). We then put the rooflight in its hole, making sure that it was the right way around. It was then just a case of screwing the clamps into the rooflight and oak frame (drilling pilot holes to make it easier to get the screws into the oak) and clipping the inner frame with the blinds in in place.
Ta da! Rooflight in place!


