
We talked in a previous post about how we went about choosing the right insulation for our van. Once the decisions were made it was time to roll up our sleeves and get it fitted!* In this post we’ll take you through the process of actually insulating and cladding the van – and what we would do differently if we were to do it again.
*It sounds a fairly simple thing to insulate and clad the van but actually lots of work had to be undertaken before we could even get to this stage, and it felt like a long time before we could begin the process of covering the walls!
What we did
We started by installing dodo matting. This is a sound deadening material that is self adhesive, so you stick it to various panels of the metal van walls. We weren’t sure about whether to install this or not as it is quite heavy (about 20kg per roll) and is expensive new (£49 per roll), but we noticed that a lot of other self builders had used it. Other options are Silent Coat and Rattle Trap. In the end we decided that it would be best to put it in as it wouldn’t be possible to add it later, and we didn’t want to regret not having it.
We managed to get 3 rolls of dodo matting from someone on eBay, which saved us quite a bit of money and meant we could be liberal with it. It didn’t come with any instructions and some people seem to have fitted it to the whole panel and others to only part of a panel (at least 50% of the area). As we had more than we needed we stuck it to the whole of each panel but you might be able to get away with less and in retrospect we probably went overboard. We applied the matting to all side (and door) panels, the sections of the roof that are higher and the wheel arches. As you’ll see it isn’t necessarily best to add too much bulk to the wheel arches if you’re going to need to take up the floor again and we would recommend saving them until last.

Whilst applying it we did a very simple test to see if it was helping – we installed dodo matting on one rear door and not the other and then tapped them from the outside – and it did make a massive difference, so we’re happy that we decided to put it in.
We then injected spray foam insulation into all of the remaining struts that were going to be too small to stuff with mineral wool, and taped over any holes in the van body (already treated with hammerite) with aluminium tape.


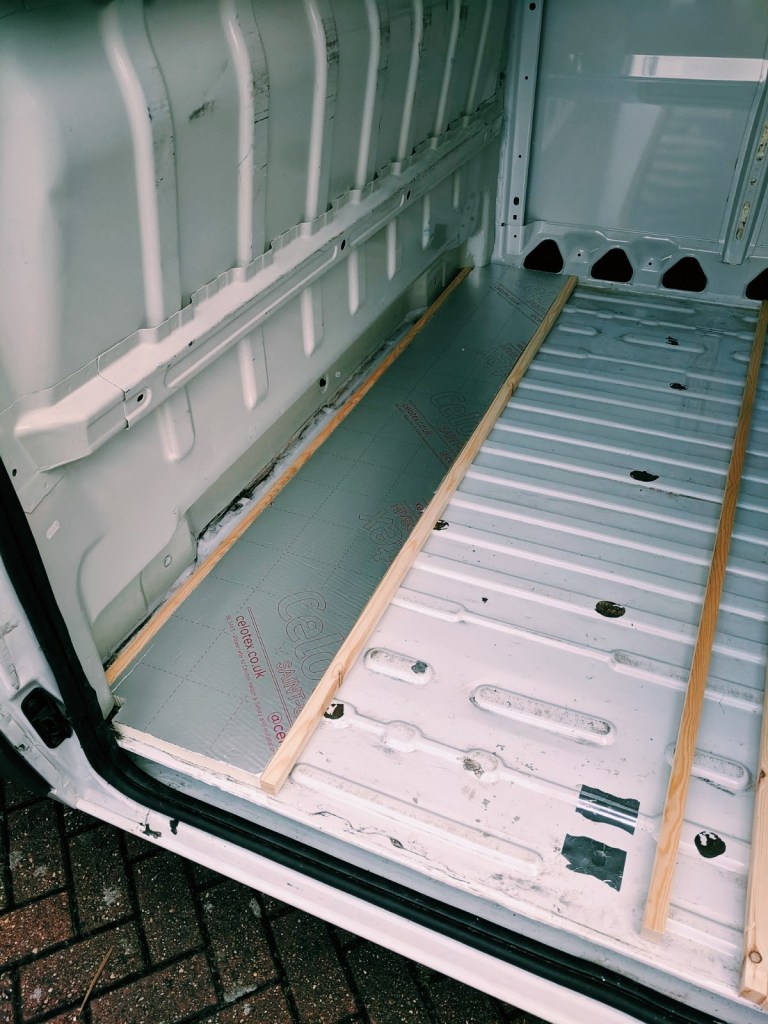
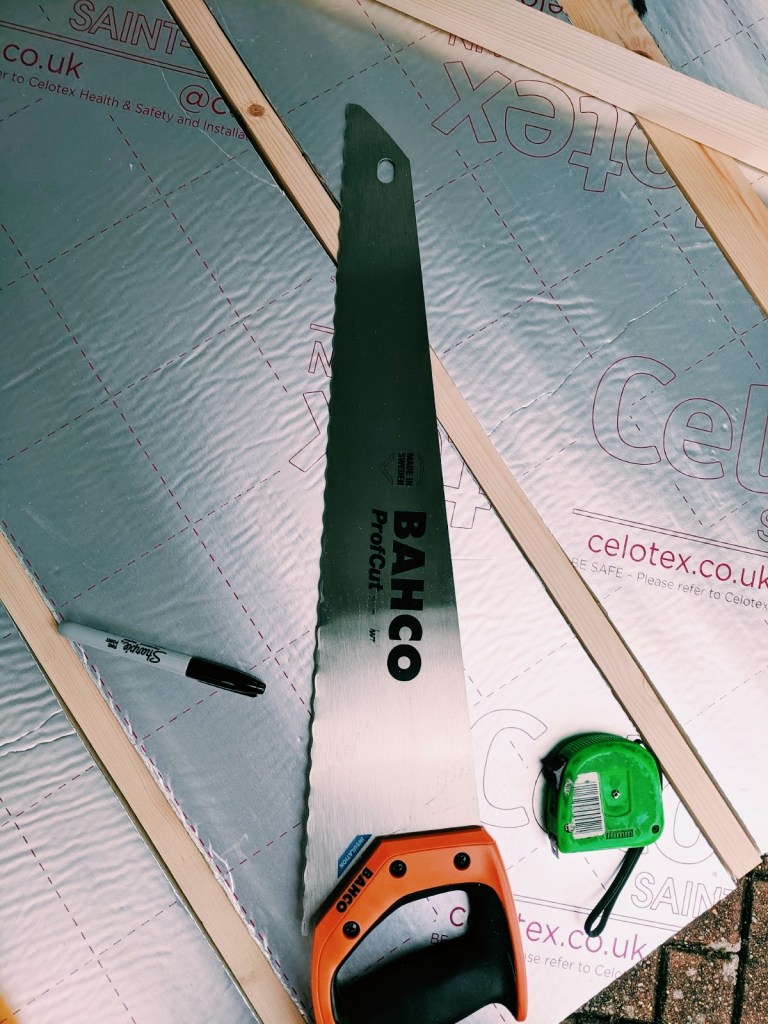
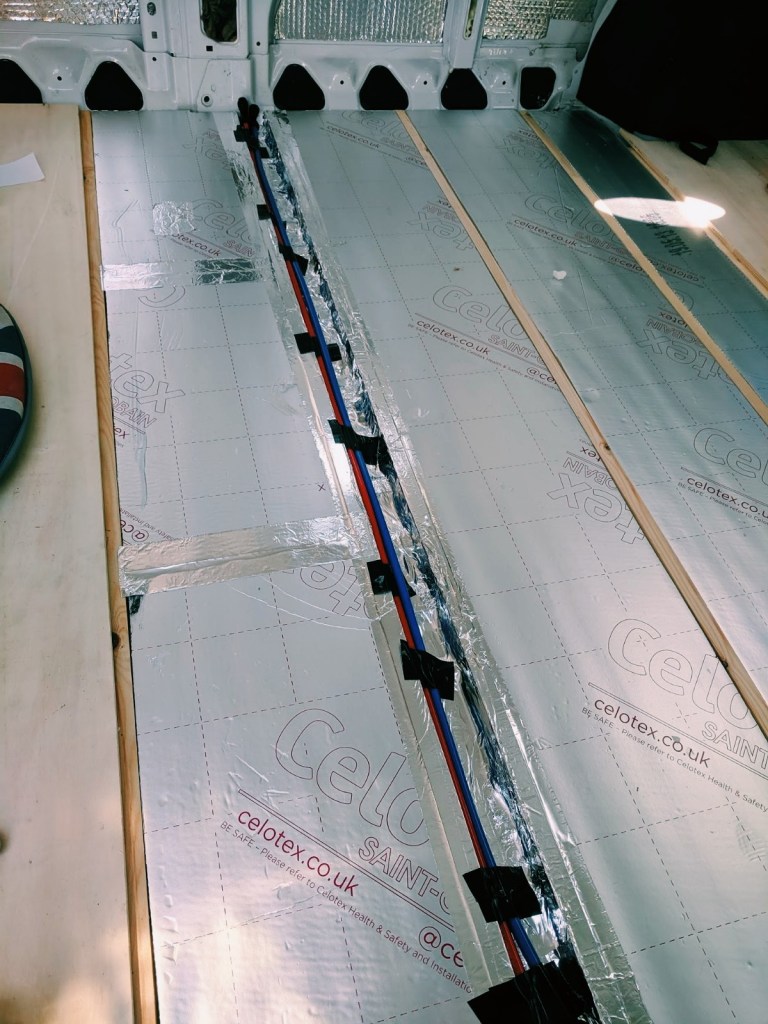
We then moved on to insulating the floor, using sheets of 25mm thick Celotex. We were a little worried that the Celotex would compress if we just laid the Celotex on the floor of the van and then put the ply on top, so we used 25 x 25mm softwood battens at 300mm centres. The battens mean that the weight of the floor is not resting on the Celotex, so it won’t become compressed over time. We stixalled the battens to the floor at 300mm centres, with 50 x 25mm battons where the sheets of ply would meet (there are 3 sections to our ply floor), so that each sheet was well supported and could be securely screwed down when we had finished. We cut the Celotex to fit between these battens (we used a Bahco insulation saw, which is a bit like a giant bread knife, it was fantastic and much much better than using a hardpoint saw), leaving a channel across the van for the water pipes to run across to the shower.


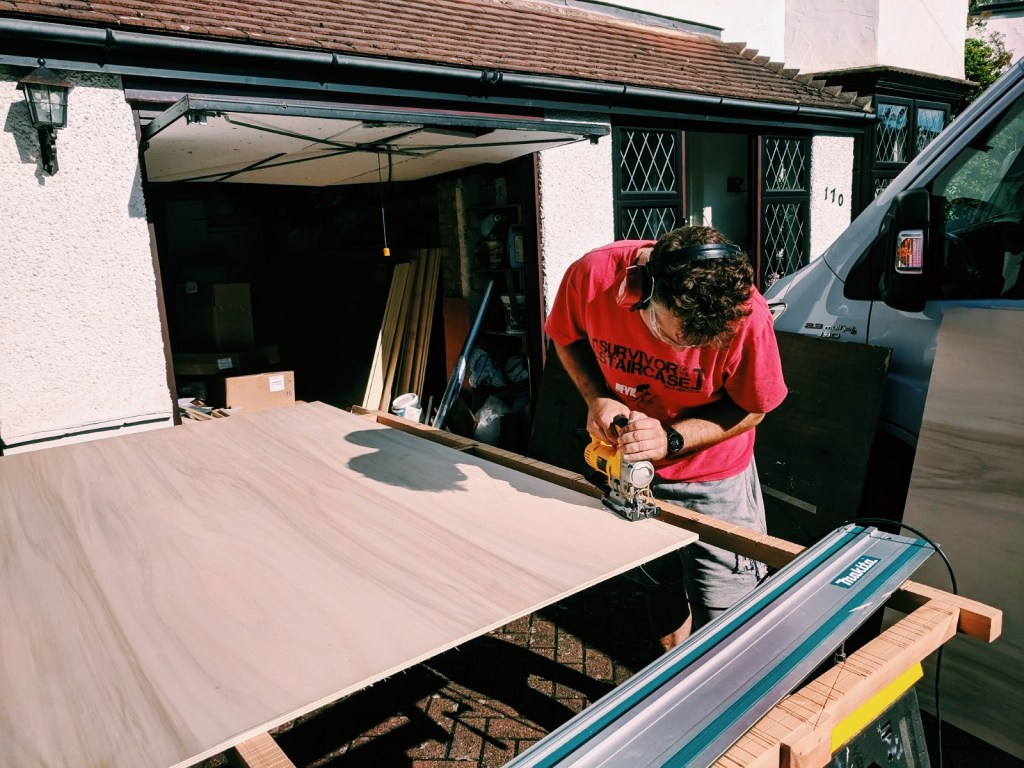
After installing the insulation we cut the 3 sheets of ply which will form the subfloor of our van (we are putting a thin reclaimed Iroko floor over the top of it) and fitted them in place.


At this stage we did the 1st fix, which involved making lots of holes through the floor to bring services into the body of the van. We found that it was much easier to drill the holes through from under the van (at least a pilot hole in the centre) as we needed to avoid the chassis members to be able to run the pipes though.
Because we wanted to avoid leaving metal swarf inside the van, as this can rust really easily, we were taking the celotex and ply up and down constantly, so that we could drill straight through all three layers (van, insulation, and ply).
Here we realised that we shouldn’t have insulated and dodo matted the wheel arches as it made getting the floor up and down much tighter. As you can see on one of the pictures below we had to temporarily remove some of the dodo matting on one of the wheel arches.
We then ran the 1st fix electrics to the rear of the van and installed all the plumbing pipe.
We pressure tested the plumbing by putting it all under mains pressure to check it didn’t leak (although we did subsequently have to change a length of pipe and didn’t retest so hopefully this is ok!!). We found that it was best to run the electrics and plumbing in the sill void that runs front to back and then stuff insulation around everything.
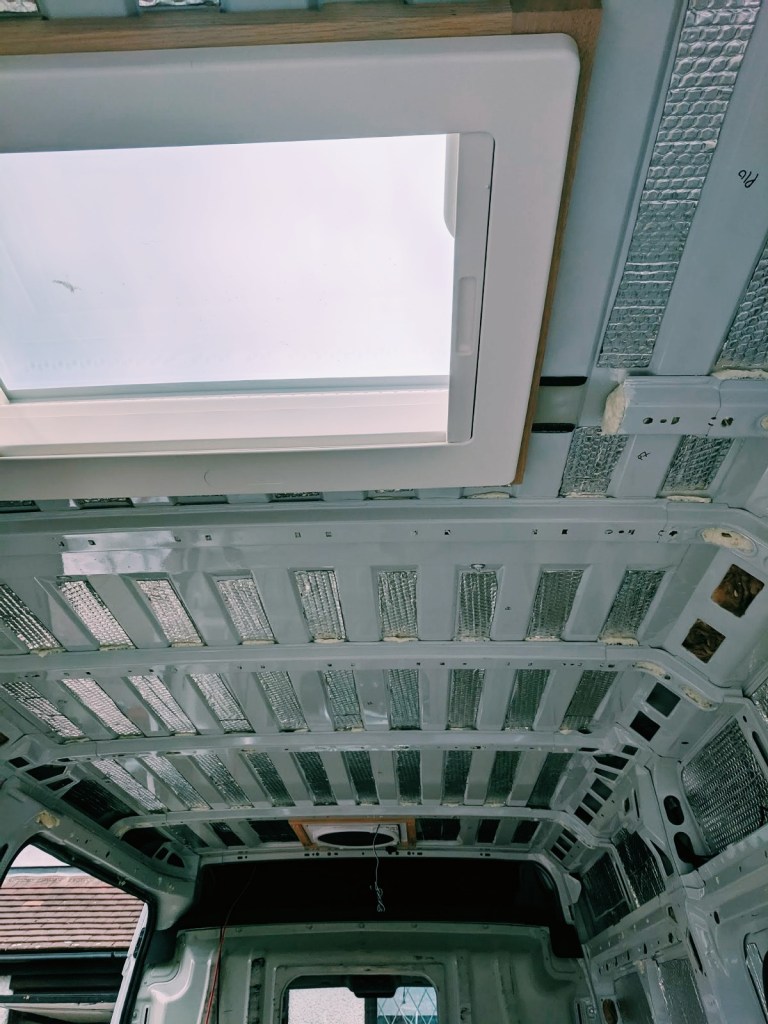
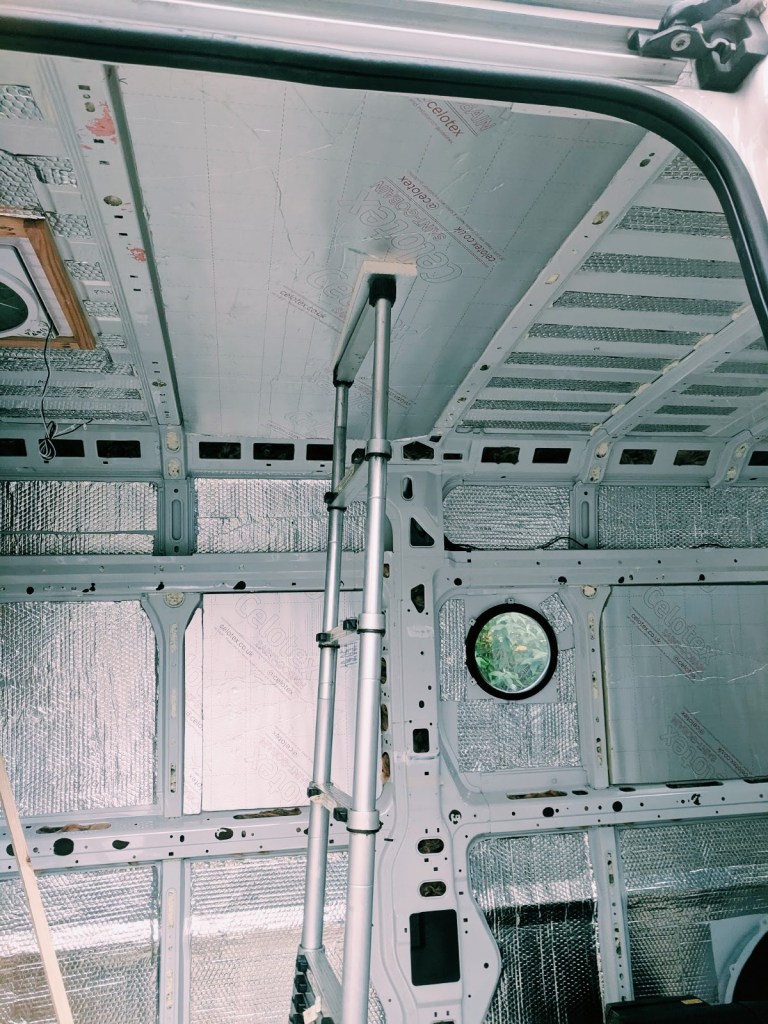
Next up we insulated the rest of the van. We cut Celotex into three of the panels, as we are going to have recessed storage shelves, two above the bed for phones and charging points and one above the cooker for spices. It’s easier to cut out a space for these inset shelves in the Celotex rather than working round them with mineral wool. We also used Celotex in the roof as again we will need to scoop some out to fit our spotlights.
The rest of the van we insulated with mineral wool that we fixed in place with spray contact adhesive. This took no time at all and we were really glad we went with mineral wool as it saved a lot of time. It is itchy though, so we recommend wearing long sleeves and gloves (we fitted ours in the 30C heat with T shirts and bare hands and got a nice rash as a result!)


After insulating came the somewhat time consuming task of installing wooden (or ply) battens on the walls and ceiling. On the ceiling we used 6mm ply battens screwed to the ceiling struts, these aren’t meant to hold the weight of the ceiling ply which we will also screw to the struts, but to space the ply off the Celotex to allow room to run the cabling for the ceiling lights, which we did at this stage. We used 50 x 25mm roofing batten in the walls as it was cheap and light – we checked the moisture content with a moisture meter and it was less than 10% so fine to use.
We worked around the van fixing battens to struts so that the ply was properly supported. The easiest bit to do was the front section where we just created a frame with the battens and didn’t have to worry angles too much. The rear section was more tricky as we are keeping it as wide as possible for the bed (which is going across rather than lengthways in the van); we had to plane an angle into the battens so that the verticals met the main horizontal members properly and there weren’t gaps.
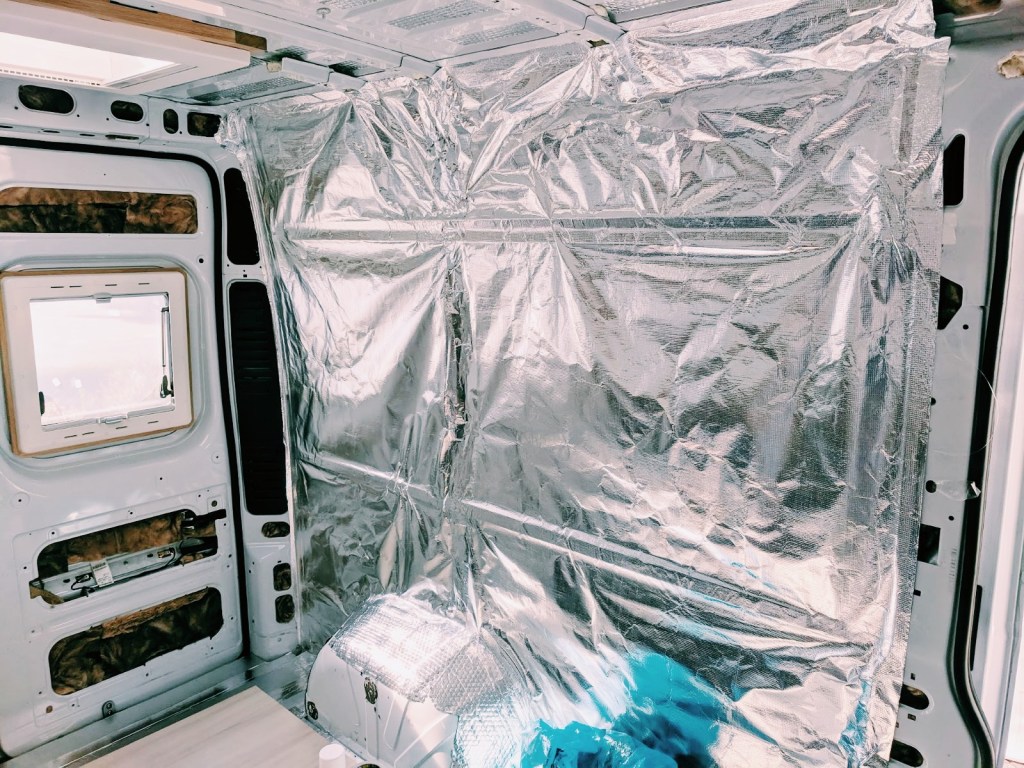
We then installed the vapour barrier, using double sided carpet tape and spray contact adhesive, tapping it to the insulation in the ceiling and the floor. This gave us a lovely silver spaceship interior ready to begin cladding!

What we would do differently
If you don’t get the order of tasks right, you will end up redoing things (we put up a vapour barrier on the same part of the van twice), or taking them up and putting them down repeatedly (the floor for us). There may always be an element of this but if we were to do the van again, this is how we would order things:
- Spray foam insulation in all of the tricky bits of the wall and ceiling
- Sound deadening matting wherever you want to put it other than the wheel arches
- Put the Celotex in the ceiling and use aluminium tape to tape between the panels
- Run 1st fix electric, gas and plumbing and drill holes to bring services into the van
- Drill drop vents
- Cut and fix all necessary battens to hold the cladding
- Insulate walls
- Insulate floor and tape between celotex
- Vapour barrier walls and tape between vapour barrier and the floor and ceiling
- Install floor boarding, drill through insulation and floor boarding from underneath van to bring services into van and run any related piping
- Dodo mat and insulate the wheel arches (might be best to ply panel the wall first).
We hope this is helpful! How have you chosen to insulate your van?
