
The majority of camper conversions will use gas, to power cooking facilities and possibly also to power things like heating/hot water/fridge. If you’re in the UK, in order to reclassify your conversion as a motorhome the DVLA requires (amongst other things) that your self build campervan conversion contain “a permanently fixed cooking facility within the vehicle, powered by gas or electricity”.
If you’re using a fixed gas supply one important decision that you need to make at a relatively early stage in your build is whether you are going to go for a gas locker or an underslung LPG tank. It’s also important to understand what the safety requirements are, so you can be sure that the installation is correct and won’t run into any issues e.g. in getting a gas safety certificate. This is mainly relevant for people like us who are planning to rent our our campervan – a gas safety certificate is not a requirement if you are using the van yourself. However, if you plan to rent out a campervan in the UK then you must have a Gas Safety Record with annual tests and ensure this is kept up to date in accordance with the Gas Safety (Installation and Use) Regulations 1998 (GSIUR).
Gas lockers
A gas locker, as the name suggests, is an internal cupboard which your gas bottles live in. It must be sealed to the inside of the van and contain a drop hole vent through the van floor. This means that if there is a gas leak, the gas doesn’t get into the main living compartment and will exit the van through the drop hole because it’s heavier than the air. Gas lockers normally open to the outside, either through a door in the wall of the van, or when the back doors are open.
Underslung LPG tank
In contrast an underslung LPG tank is mounted underneath the van and doesn’t require any inside space. This was appealing to us as we are deliberately sacrificing some storage space in favour of an open feel – so it’s even more important that we use the storage space we do have inside the van well.
In addition to giving additional internal space, an external LPG tank allows you to refill before the tank is empty and so only put in what you use. If you use standard gas bottles they are only refillable by exchange. You can get refillable bottles but they are quite expensive (although a little cheaper than an underslung tank). Given that we intend to rent our van out when we are not using it, being able to refill the gas tank seemed like a good idea as we can ensure that it is topped up before someone picks the van up.
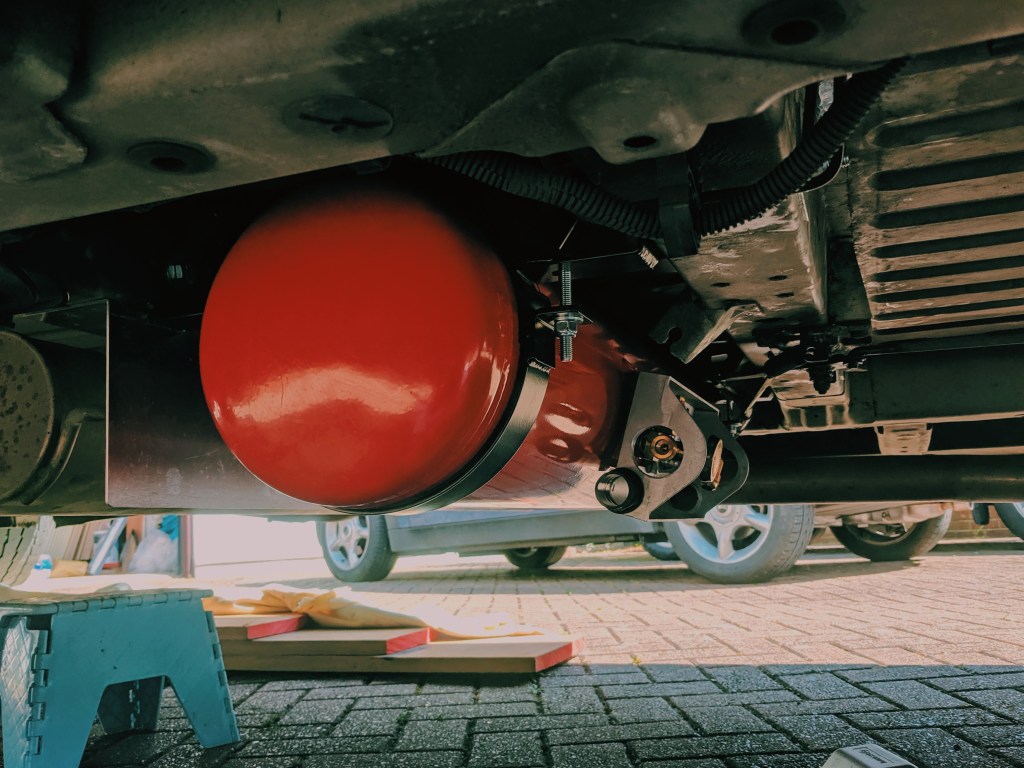
Fitting the tank
We bought our LPG tank from Autogas2000. There are a couple of different manufacturers, but the Autogas tank has a good bracket system that allows the tank to be removed from its cradle without disturbing the floor of the van. If we ever had an issue with the tank, this seemed like an important feature. Autogas are based in Thirsk and this is the one job that we wouldn’t do again if we did a second van – we would definitely take the van up and pay them to fit it. The tank is reasonably heavy and even with axle stands, fitting it is difficult. However, we didn’t know this when we started….
We don’t have many pictures of fitting the tank, as it was awkward to get underneath with a camera, but we followed the excellent instructions that were provided with the tank. We decided that we wanted to fit the filler underneath the Diesel fill point, behind the fuel flap. This was a handy tip that we picked up from a fellow Ducato owner at Camp Quirky – if you have a Euro 6 Ducato there is an empty slot here which you can use for the gas fill point as it doesn’t have an Ad Blue tank, which other Sevel vans do have.
In order to run the pipe here you need a 2.5mm filler pipe (the kit includes a 1.5m as standard) and you need to rotate the valve of the tank that the pipe fits to to the 7-8 o’clock position, so that the pipe can run out of the correct side of the tank. You will also need to make up a bracket to hold the filler attachment and fitting this will take some time as it is really tight on space.
To minimise the time spent crawling around under the van we also chose to get a Truma solenoid valve that allow us to turn the low pressure side of the gas off from a switch inside the cab. This means that we can switch the gas off without having to go under the van – we plan to use this when we are driving and also means that we can easily turn it off as required when we take the van on the Eurotunnel or Ferry.
Prior to fitting our gas tank we had already found a gas safe engineer who has signed off other vans as required; to get our certificate we will just need to take it to be inspected (and also add an LPG sticker to the outside of the vehicle).
